Gabion Connection Methods

Considerations
Council approvals are often required for any wall, either decorative, boundary or retaining, depending upon height and location. It is best practice to plan carefully by engaging the services of a design engineer who will certify both the design and construction. Based upon the design which will take into account mass, slope, drainage and in the case of retaining any surcharge which may affect the stability of the wall.
We recommend all gabion walls are constructed carefully with safety in mind and utilise a design engineering service to ensure your structure meets any council conditions. A town planner maybe your first contact if building a wall along a front boundary for example.
1)Spirals
Spirals are supplied in lengths of 300mm, 500mm, 750mm, 975mm, 1000mm, 1200mm. Each kitset contains a combination depending which size of gabion is ordered.
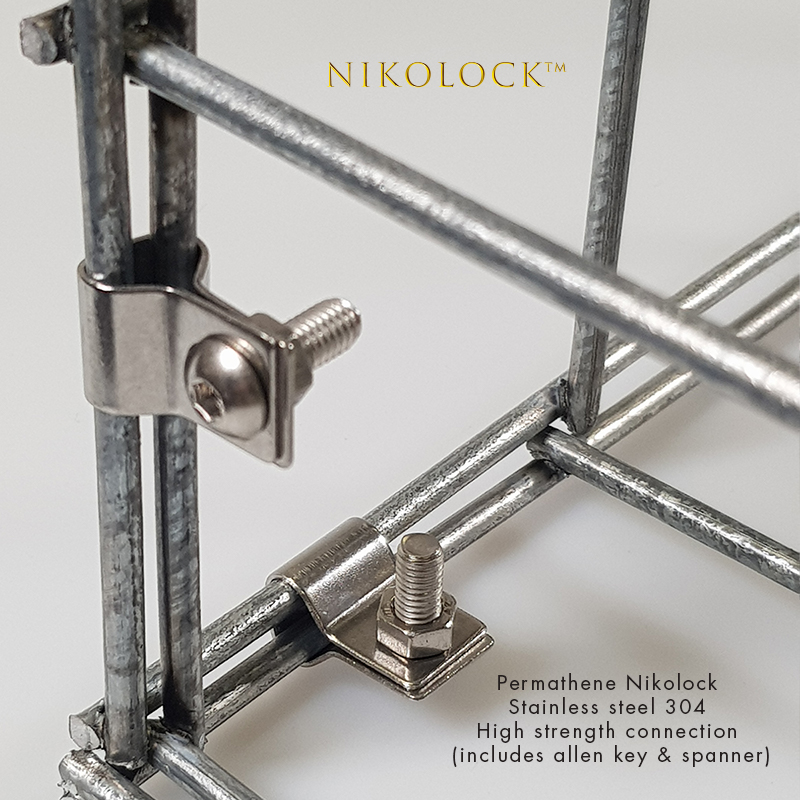
2) Nikolock
Supplied in stainless steel 316, Nikolock are a new connection method that provides a neat looking finish as they can be placed so as not to be seen. Suitable for 4mm wire only. The installation process can be sped up by using an allen wrench bit inside a cordless drill.
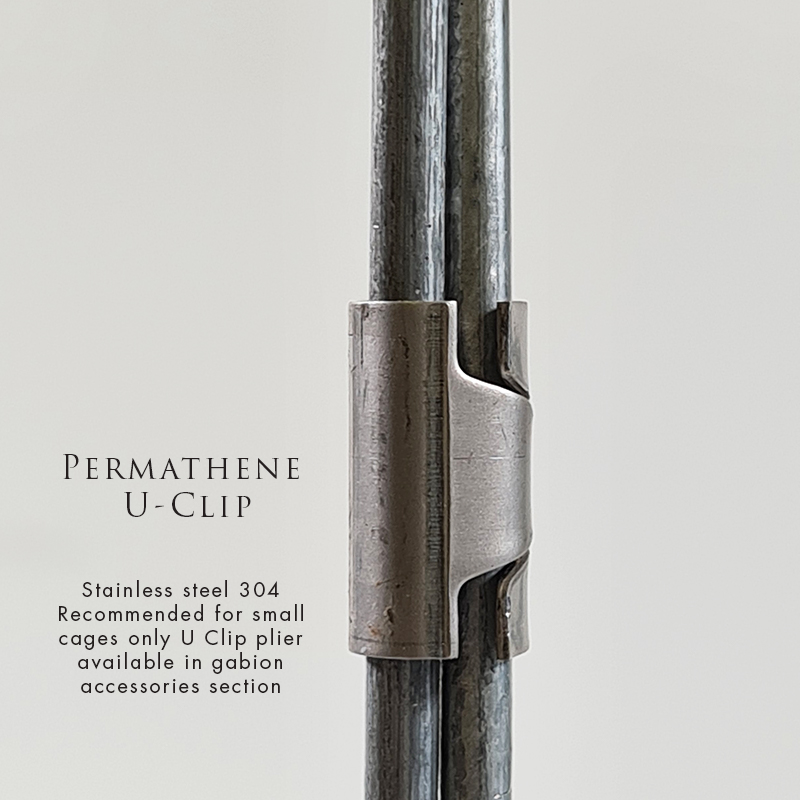
3) U Clip
Supplied in stainless steel 316, U clips are fastened using a U clip plier which is available for purchase. The U clip is not suitable for large walls higher than 1m (non retaining) due to strength being a lot less than the other methods. These are only suitable for 4mm diameter wire.
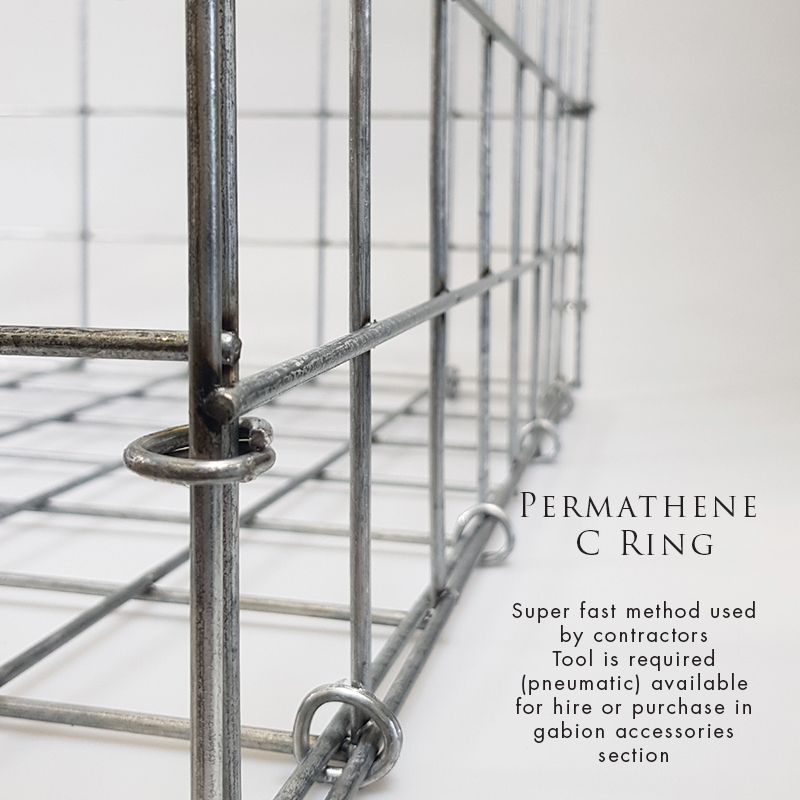
4) Hog Rings
Gabion hog rings are 3mm in diameter and 45mm wide. Available in both galfan and stainless steel (304). With a tensile strength of 1700-1900N/mm2 these are a good method to build gabion walls, however they are still not as strong as spirals. To use gabion hog rings a pneumatic tool such as the Meihotech M500 is required. These are available for purchase or rental*. C rings are a quick method preferred by most landscapers.
* An M500 Hog Ringer tool is available for rental when used in conjunction with Permathene gabion products. We stock up to a dozen rental tools at any one time which can be shipped anywhere in Australia.
Construction Guide Specification
Gabion Wall Construction Specification
1) Scope
The work shall consist of supply, construction of cages and filling with rock.
2) Types
Permathene Gabions shall consist of square or rectangular welded mesh constructed to form containers filled with rock. The gabion mesh supplied to site shall conform to ASTM 974-97. The weld shear strength is meet a minimum of 50% of wire tensile strength. The wire shall be mild steel coated with 280 gsm (min) Al 10%, Zn 90%. The wire shall have a tensile strength between 350-750 N/mm2.
3) Materials
All connections including spirals and stiffener wires shall be manufactured in minimum Galfan (5% Al, 95% Zn) or in the higher specification wire Permathene Al-Ten (Al 10%, Zn 90%) coated mild steel to the same diameter as the mesh. C rings shall be Meihotech, Galfan coated, 3mm diameter, 45mm opening, tensile strength 1700-1900 N/mm2.
Rock should be 60mm - 200mm. If larger rock is used care must be taken in placement. To prevent buckling of mesh 5mm diameter wire maybe specified if larger than standard rock is used.
Where walls greater than 1m high, cages of 500mm (100x50mm pitch) or 525mm (75x75mm pitch) height (stacked) will provide easier construction and a better appearance.
INSTALLATION GUIDE
1) Foundation preparation
The foundation on which the gabions are to be placed shall be cut or filled and graded as required. Surface irregularities, loose material, vegetation, and all foreign matter shall be removed from foundation surface area. Gabions and bedding or specified geotextiles shall not be placed until the foundation preparation is completed, and the subgrade surfaces have been inspected and approved by the engineer or the engineer’s representative. Compaction of bedding or filter material will be required per plans and specifications. The surface of the finished material shall be to grade and free of mounds, dips or windrows. Extra care should be taken with foundation preparations in order to ensure a level and smooth surface. Geotextile shall be installed in accordance with the requirements of the plans and specifications.
2) Assembly
The assembly and placement of gabions shall be in accordance with the following procedures: Assembly. Rotate the gabion panels into position and join the vertical edges with fasteners for gabion assembly. Where spiral fasteners are used, crimp the ends to secure the spirals in place. Where C ring type alternate fasteners are used for basket assembly, install the fasteners at a maximum spacing of 150 mm. Use the same fastening procedures to install interior diaphragms where they are required. Interior diaphragms will be required where any inside dimension exceeds 1m for gabion baskets. Diaphragms will be installed to assure that no open intervals are present that exceeds 1m.
3) Placement
Place the empty gabions on the foundation and interconnect the adjacent gabions along the top, bottom, and vertical edges using spirals or C rings.
Modular Assembly
Gabion cages can be built in a modular method by eliminating an end panel for each cage so no two panels need be connected together. The same method may also be used for successive courses including lid and base panels. Interconnect each layer of gabions to the underlying layer of gabions along the front, back, and sides.
4) Filling operation
After adjacent empty wire gabion units are set to line and grade and common sides properly connected, they shall be placed in straight-line tension to gain a uniform alignment. Staking of the gabions may be done to maintain the established proper alignment prior to the placement of rock. No temporary stakes shall be placed through geotextile material. Connecting lacing wire and other fasteners (as allowed) shall be attached during the filling operation to preserve the strength and shape of the structure.
Internal connecting cross-tile (stiffener) wires shall be placed in each unrestrained gabion cell, including gabion cells left temporarily unrestrained. Two internal connecting wires shall be placed concurrently with rock placement, at each 300 mm interval of depth. In welded mesh gabions these cross ties or stiffeners will be placed across the corners of the gabions (at 300 mm from the corners) providing diagonal bracing. Lacing wire or preformed wire stiffeners may be used.
The gabions shall be carefully filled with rock, either by machine or hand methods, ensuring alignment, avoiding bulges, and providing a compact mass that minimizes voids. At no point in the filling process may rock be mechanically placed from a height of over 1m from machine to fill area. Machine placement will require supplementing with handwork to ensure the desired results. The cells in any row shall be filled in stages so that the depth of rock placed in any one cell does not exceed the depth of rock in any adjoining cell by more than 300 mm. Along the exposed faces, the outer layer of stone shall be carefully placed and arranged by hand to ensure a neat, compact placement with a uniform appearance.
The last layer of rock shall be uniformly leveled to the top edges of the gabions. Lids shall be placed over the rock filling using only approved lid closing tools as necessary. The use of crowbars or other single point leverage bars for lid closing is prohibited due to the potential for damage to the baskets.
The gabion lid shall then be secured to the sides, ends, and diaphragms with spiral binders, approved alternate fasteners, or lacing wire wrapped with alternating single and double half hitches in the mesh openings.
Any damage to the wire or coatings during assembly, placement and filling shall be repaired promptly in accordance with the manufacturer’s recommendations or replaced with undamaged gabion baskets.
Repair of Cages
If it is necessary to weld or to bend weld mesh gabion cages using high heat such as oxy acetylene care must be taken to ensure the repair is adequately protected by applying cold gal or other metal type paint. This is because welding will remove the protective aluminium/ zinc coating and expose the steel to the elements.
Construction
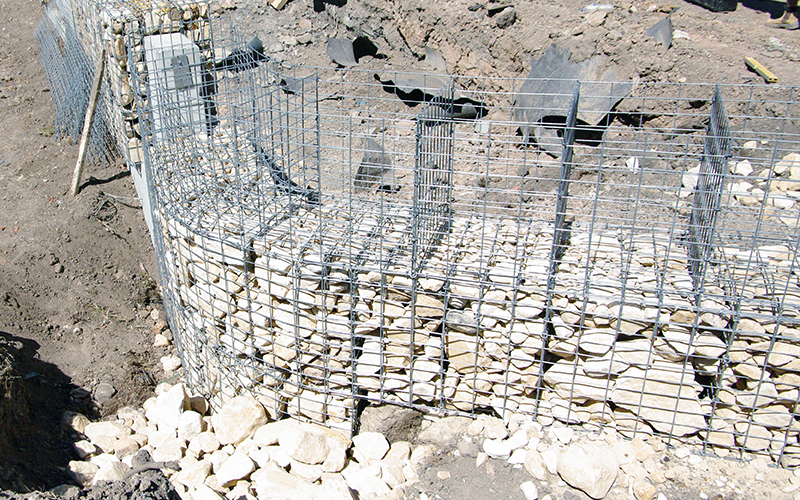
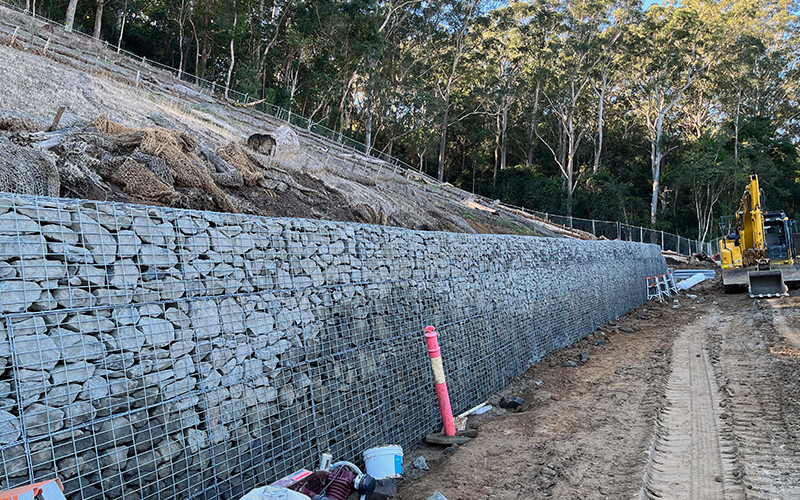
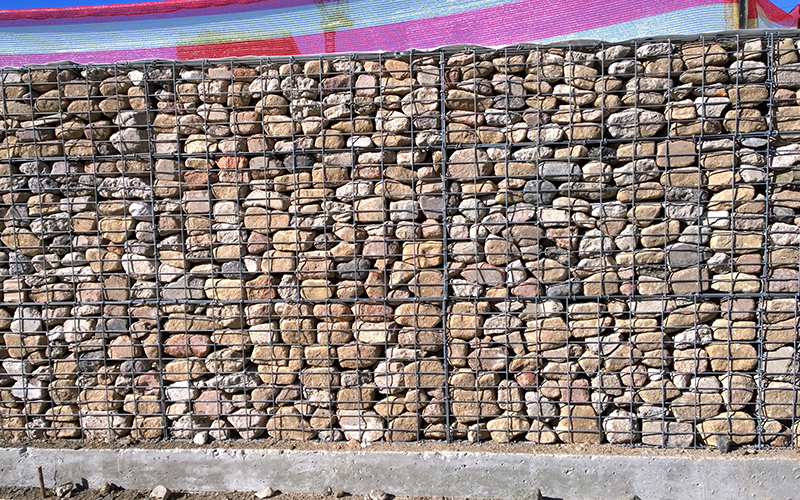
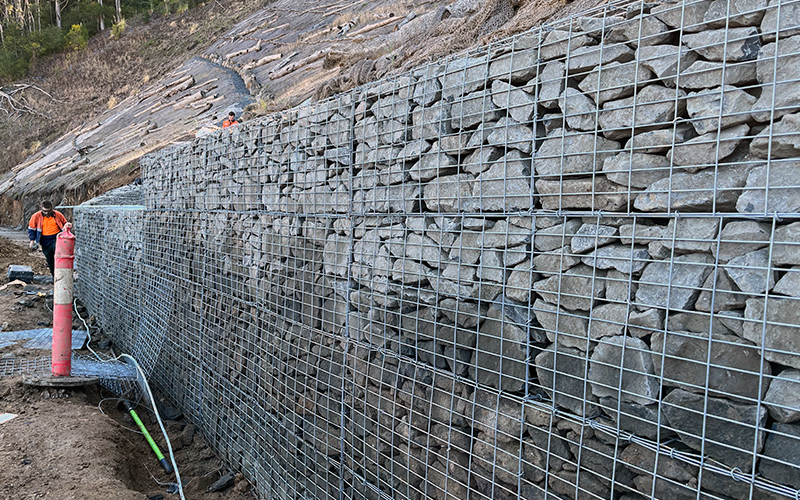
To achieve a perfect look it is preferable to stack smaller cages of 2m x .5m high as in the above photographs. All of these projects used concrete footings. It is not required for gabions but it does ensure a perfect look without settlement at the base.
Once filling is complete the contractor will often use plywood boards placed against the cage faces and push flat using a digger bucket. The tension of lacing wire is increased to prevent further movement. This is often necessary where the end result is for a perfectly flat face. Care needs to be taken to ensure no damage to the structure occurs.
Kitset Home Construction
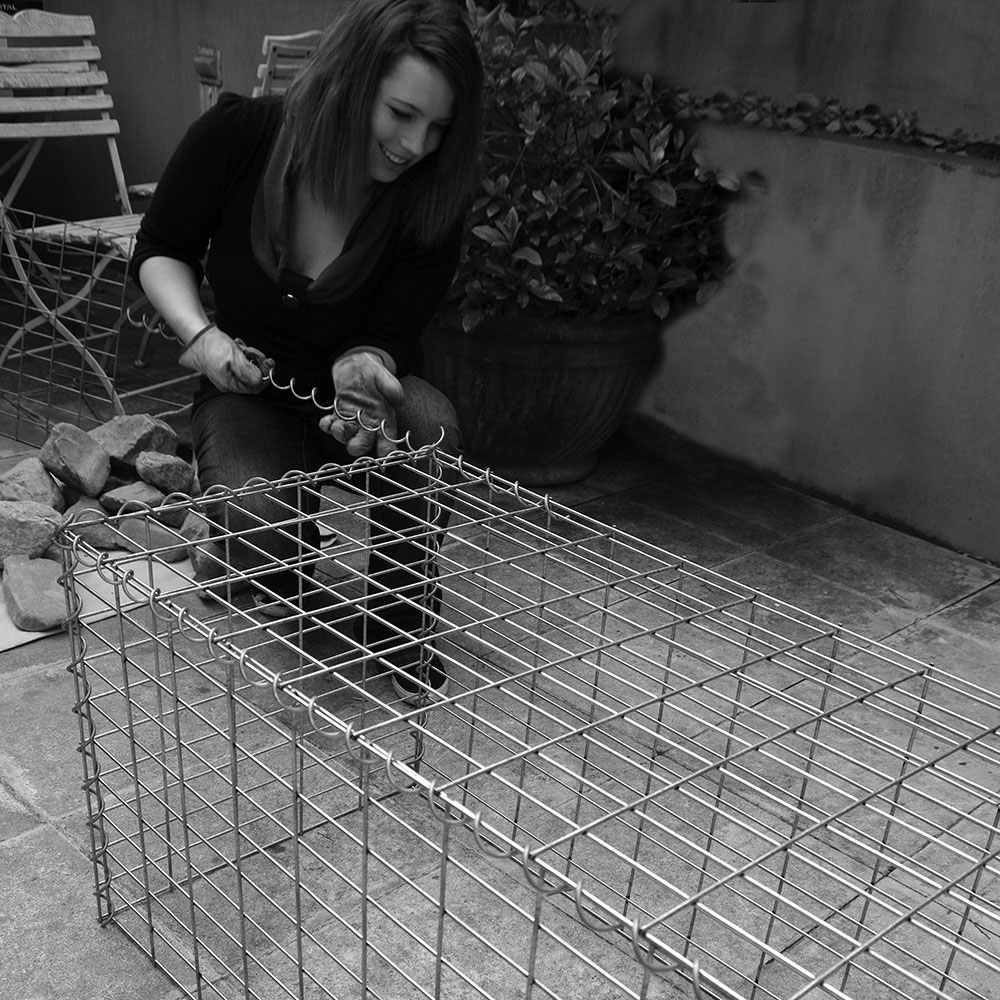
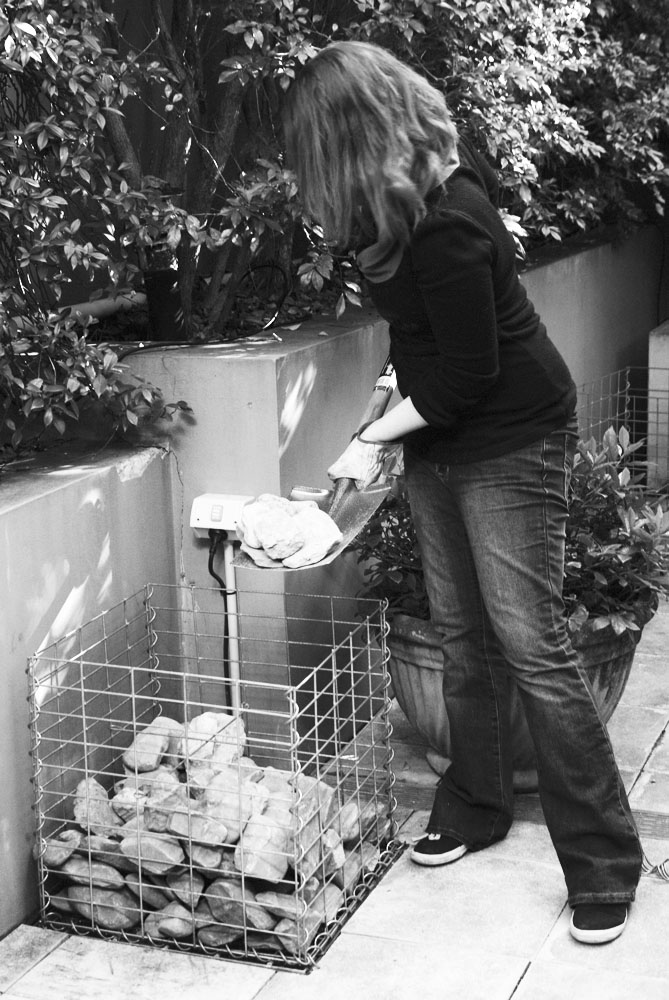
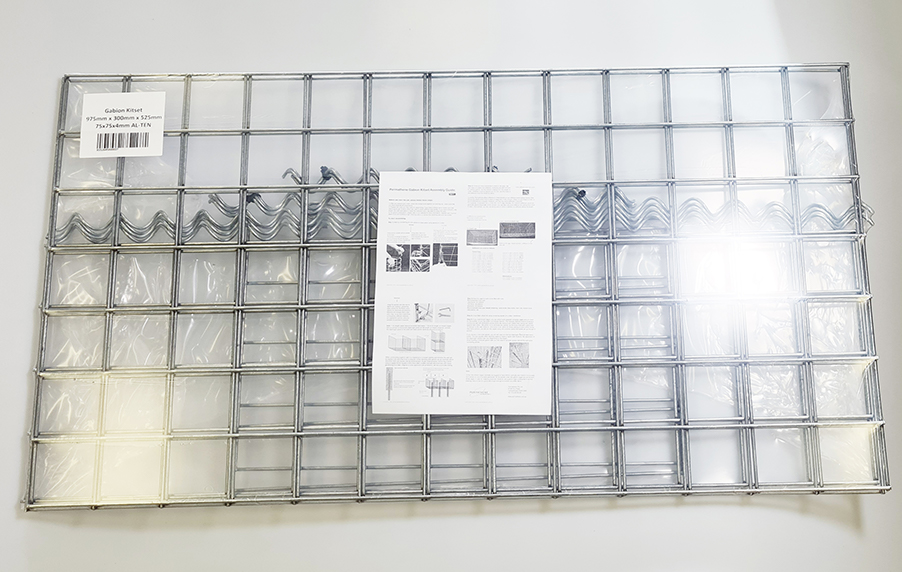
Please follow the pdf guides depending upon the size of cage you order. The stiffener (supplied) placement is very important. Depending upon the cage size these could be 310mm, 510mm, 530mm, 545mm, 975mm. Larger cages can have a combination and require up to 18 stiffeners.
Once the cage is complete with spirals and stiffeners it is necessary to close these to prevent them falling off.
Kitset Cage Wholesale Packs
Permathene supplies kitset packs including all accessories which are wrapped with instructions and bar coding.
These allow easy checkout for landscape suppliers and garden centres.
Note: limited sizes for bulk orders including 2m x .3m x .3m, 2m x .5m x .5m and smaller. Please contact us for pricing.
Manufactured and packaged in Australia.
